Homemade Coconut Milk How To Extract Coconut Milk
Homemade Coconut Milk: How to Extract Coconut Milk
So you’ve just bought a fresh coconut and you’re wondering how to turn it into creamy, delicious coconut milk. Well, you’ve come to the right place! In this article, we’ll guide you through the process of extracting coconut milk right in the comfort of your own home. From cracking open the coconut to straining out the milk, we’ve got you covered. Let’s get started!
Why Make Homemade Coconut Milk?
Before we dive into the process, you might be wondering why you would bother making your own coconut milk when you can easily buy it at the store. Well, there are a few advantages to making it yourself:
1. Freshness: Homemade coconut milk is significantly fresher compared to store-bought versions, which often contain preservatives and additives.
2. Quality Control: By making your own coconut milk, you have control over the ingredients and can ensure it is pure and free from any unwanted ingredients.
3. Cost: Homemade coconut milk can also be cost-effective, especially if you have a ready supply of fresh coconuts available.

Now that we’ve established the benefits of making homemade coconut milk, let’s move on to the step-by-step process.
Step 1: Crack Open the Coconut
The first step in extracting coconut milk is cracking open the coconut itself. This may sound daunting, but with the right tools, it’s a breeze. Here’s what you’ll need:
– A sturdy knife or machete
– A bowl to collect the coconut water
Take the knife and firmly tap the center of the coconut near one of the “eyes.” Rotate and tap until cracks begin to form. Once you see cracks, continue tapping around the coconut to create a line. With a little force, the coconut should split open. Hold it over the bowl to collect the coconut water inside. Set the water aside for later use or drink it as is for a refreshing treat.
Step 2: Remove the Coconut Meat
Now that the coconut is cracked open, it’s time to remove the meat. Start by using a spoon or a butter knife to scoop the meat away from the inner shell. Work your way around the whole coconut until all the meat is free.
Step 3: Grate the Coconut
Once you have all the coconut meat, it’s time to grate it. You can use a box grater or a food processor with a grating attachment. Grate the coconut meat into a separate bowl.
Step 4: Add Hot Water and Soak
Now that you have grated coconut, place it in a blender along with hot water. The ratio of coconut to water can vary depending on how thick you want your coconut milk. A common ratio is 1 cup of grated coconut to 2 cups of hot water. Blend the mixture on high for a few minutes until the coconut is finely ground.
Step 5: Strain the Mixture
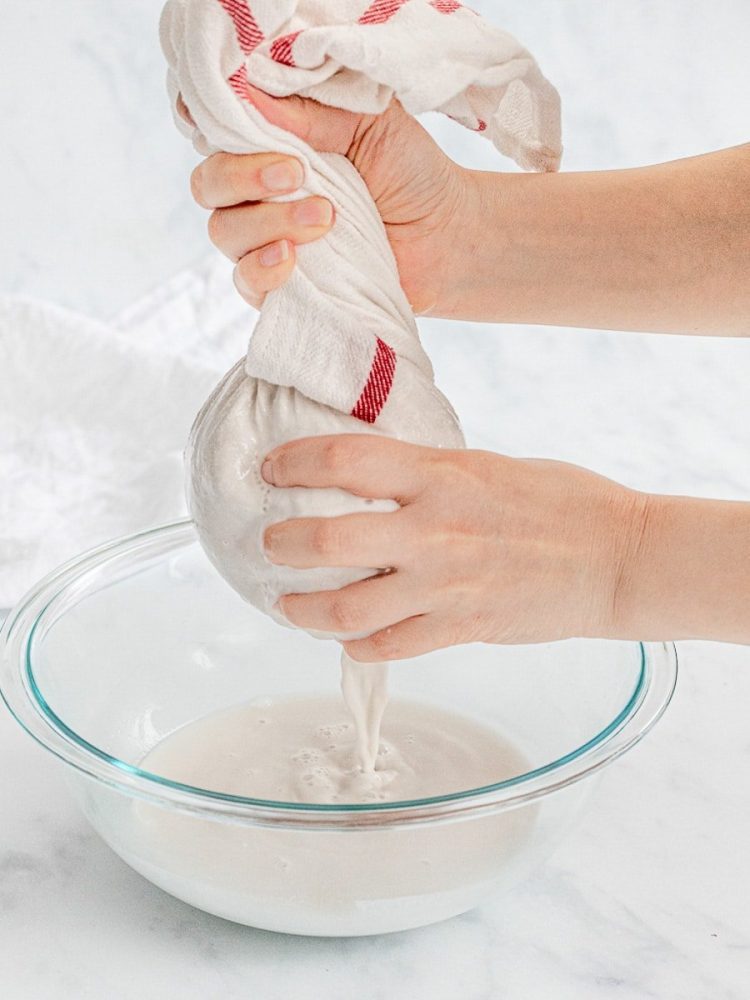
To separate the coconut milk from the pulp, you’ll need to strain the mixture. Place a fine-mesh sieve or cheesecloth over a bowl or large container. Slowly pour the blended coconut mixture onto the sieve, allowing the liquid to drain through while catching the pulp.
Step 6: Squeeze Out the Milk
Once you’ve strained the mixture, gather the cheesecloth or sieve edges and squeeze out as much liquid as possible. This process ensures that every drop of coconut milk is extracted.
Step 7: Store and Use
Voila! You now have homemade coconut milk. Transfer the freshly extracted milk to a jar or container and store it in the refrigerator. It should keep for about 3-4 days. Remember to give it a good shake before using it in any recipe.
Frequently Asked Questions
Can I use a blender instead of grating the coconut?
Yes, using a blender is a quick and efficient way to extract coconut milk. Simply blend the grated coconut with hot water, strain, and squeeze out the milk.
What can I do with the leftover coconut pulp?
Don’t throw away the leftover coconut pulp! You can repurpose it in various ways, such as using it as a topping for baked goods, mixing it in smoothies, or even dehydrating it to make coconut flour.
Can I freeze homemade coconut milk?
Yes, you can freeze homemade coconut milk. Pour it into ice cube trays or freezer-safe containers for convenient portioning. Thaw it in the refrigerator when you’re ready to use it.
How long does homemade coconut milk last?
Homemade coconut milk typically lasts about 3-4 days when stored in the refrigerator. However, always use your senses to check for any signs of spoilage before consuming it.
Final Thoughts
Making homemade coconut milk is not only a fun and rewarding process but also allows you to enjoy the freshness and purity of this tropical ingredient. With just a few simple steps, you can create your own creamy coconut milk to use in a wide range of dishes, from curries to smoothies to desserts. So why not give it a try? Crack open a coconut, follow our guide, and savor the deliciousness of homemade coconut milk. Your taste buds will thank you!


